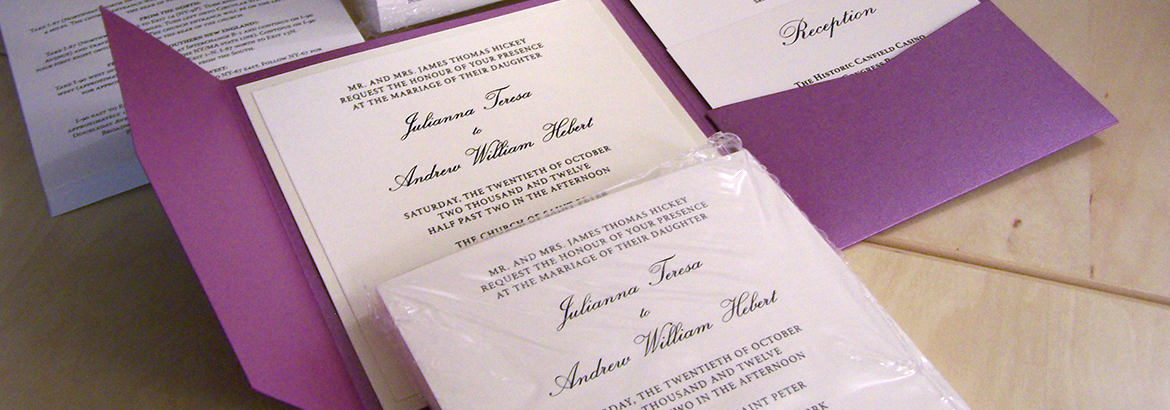
Assembling Pocket Wedding Invitations
Assembling The Pocket Fold
We continue to be evolving the art of beautiful pocket invitations and making them easy to assemble for any wedding. There is no right or wrong way to assemble these pocket fold invitations but here are a few tips and steps to achieve great results.
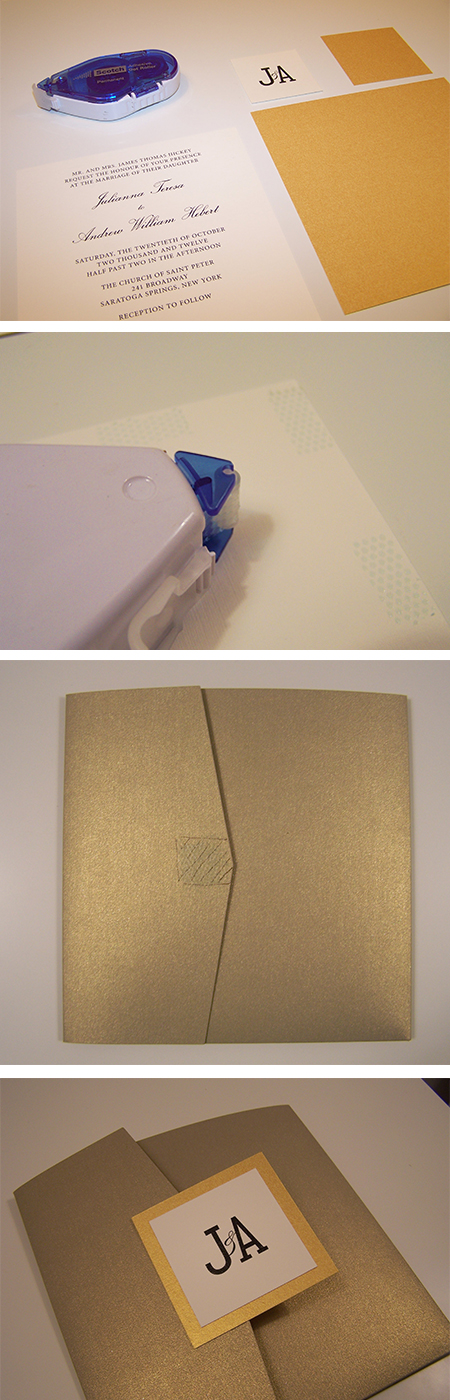
Step One: Gather Your Materials, and the bridal party!
Our wedding pocket invitations come designed, printed and cut to size. Using permanent Glue Dots from Scotch allow for mess-free easy assembly. These specific glue dots have worked best and are worth the price! You will need a few to get started, but depending on the number of invitations and the amount applied, you may need to purchase more. You can find them online or at craft stores like Michaels and Jo Ann Fabrics.
Step Two: Glue Liner Into Pocket
Apply Scotch Permanent Glue Dots around the outer edge of the color liner, especially on each corner. Just a single line around most of the edge will be enough for secure it in the pocket. Center the color layer inside the pocket and press firmly.
Step Three: Glue Invitation onto Liner
Using the same technique, apply the glue dots to the outer back edge of the invitation and position as centered as possible onto the color layer before applying pressure.
– Assembling The Monogram Square –
Step One: Glue Monogram onto Color Layer
Apply Scotch Permanent Glue Dots around the outer edge of the printed monogram, especially on each corner. Just a single line around most of the edge will be enough for secure it.
Step Two: Apply Glue Dots to Pocket Fold Flap
Arrange your pockets as if you were opening it. Apply the glue dots to the outer part of the pocket flap (shown on the right).
Step Three:
Center your assembled monogram square on the folded pocket and press firmly. The monogram will be glued to the pocket flap. Should you wish to have the pocket closed, you can apply a small amount of glue dots to the pocket to keep the pocket closed but easily opened and resealed if needed.